


Since many new reptile owners are asking about the Zoo Med Incubator, I’ll be giving you a complete and thorough review of it.
In this review, I’ll narrate to you some of the features I loved about the Zoo Med ReptiBator. I’ll discuss its features, its pros and cons, why I think it’s the best, and what other people have to say about it!
This post contains affiliate links, and I will be compensated if you make a purchase after clicking on my links.
Table of Contents
Zoo Med Incubator: ReptiBator Digital Egg Incubator Review
Zoo Med’s ReptiBator Digital Egg Incubator isn’t like the $80-90 incubator you’re using right now. The product details of this bad boy encompass what you know of a reptile incubator.
It’s packed with many exciting features and functionalities you won’t ever find with a regular air reptile egg incubator.
I bought and tried Zoo Med’s incubator for my bearded dragon eggs, but bearded dragon eggs aren’t the only reptiles it can accommodate.
It’s so versatile that you can use it for many different types of reptiles such as crested geckos, leopard geckos, king and corn snakes, ball pythons, and many more! Here are some of its features!
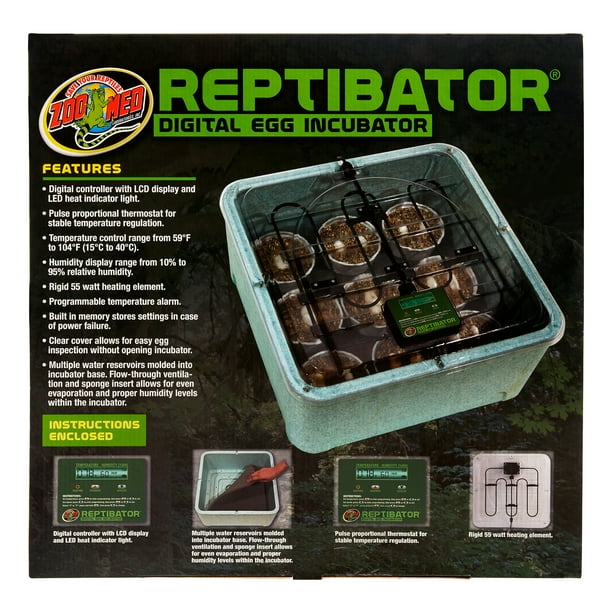
Features and Attributes of the Zoo Med Incubator
It’s easy to use and convenient because it’s equipped with an LCD and a digital controller, complete with an LED heat indicator light for easier navigation and controls.
The temperature control range is between 15 to 40 °C (59 to 104 °F) [1], which allows the incubation process to take place effectively.

Brian Barnett, an expert in herpetology for about 50 years, said that before placing the eggs inside, it’s imperative that the incubator’s temperature is first checked and assessed. [2]
This is because the actual temperature on the thermostat might vary from that in the egg containers.
“It is advisable to pre-set the desired temperature in the incubator before the eggs are placed in the containers.”
I was more than contented with Zoo Med’s ReptiBator because it had everything that my bearded dragon eggs needed. The temperature control was accurate, it wasn’t too humid, and it’s spacious!
What’s the Size of the Incubator?

The Zoo Med Incubator’s size is 18.5 x 18.5 x 9.5 inches and has a wattage of 55 watts.
Benefits & Drawbacks of Using the Zoo Med Incubator
| Benefits | Drawbacks |
|---|---|
| It has been effective in holding an accurate incubation temperature | It’s more expensive compared to other commercial incubators of the same quality. |
| The removable incubator base makes cleaning more accessible and more convenient. | Water seeps through the bottom or base of the incubator |
| Contains a built-in proportional thermostat for easier temperature control range | It’s not as sturdy as advertised |
| It can be used for reptile eggs (corn snakes, monitor lizards, etc. | The built-in thermostat did not work to be accurate |
| You can use a secondary thermometer with it | |
| The programmable temperature alarm makes it safe for a power failure or outage. | |
| It has a proven 70% and above success hatch rates. |
Why the Zoo Med ReptiBator Digital Egg Incubator is the Best in the Market
Equipped with all necessary features, it can guarantee stable temperature regulation and perfect humidity control. The product is reliable and durable for its price that’s why it is the best reptile incubator.
The Styrofoam base makes it more versatile, giving way for the incubator to have a humid environment. It’s the all-around, perfect digital incubator for reptile eggs.
It has multiple water reservoirs stocked in the incubator’s base for better ventilation and evaporation; it also has a sponge insert, allowing better humidity levels and evaporation inside!
If you’re a beginner or if you’ve been in the market for a long time like me and you haven’t found a good-quality incubator yet, try Zoo Med’s ReptiBator and it’ll surely cater to what you need!
Here’s a quick video detailing the specifics of the Zoo Med digital incubator.
What Reptile Enthusiasts Have to Say About the Zoo Med ReptiBator
AccreditedNobody, a Reddit user had a comparison of the Zoo Med ReptiBator and Exo Terra’s incubator. According to this user, the Zoo Med incubator is better overall.
“Have you heard of ‘you get what you pay for? Personally, I liked Zoo Med’s better than the Exo Terra one because of its excellent heat panel and thermostat.”
READ MORE: How to Hatch Bearded Dragon Eggs Without an Incubator
Considerations in Choosing the Zoo Med ReptiBator

I sincerely consider Zoo Med’s ReptiBator as an economic reptile egg incubator. But for you to know if an incubator is perfect for you, try viewing the ease of setting up and the convenience of using it.
Step-by-Step Guide in Setting Up the Zoo Med ReptiBator
At first glance, you might think that it’s difficult to set up. So, here’s a guide I made that can teach you the correct way of setting up your Zoo Med Incubator.
Step 1: Position the Incubator
The first step is to ensure the placement of the incubator inside your home. Place it at a spot where there are little-to-no fluctuations in temperature.
This will help keep the temperature and humidity levels inside the incubator consistent. I placed mine near the bedroom where the temperature isn’t changed by the amount of light that enters the house through the windows.
Step 2: Add Water to the Reservoirs
When the incubator is appropriately positioned, the next step is to fill the water reservoirs through the water channels.
Depending on the type of reptile eggs you’re dealing with, you might not need to fill the water reservoirs any longer.
QUICK NOTE: When adding water, make sure not to overflow it; it can seep through ventilation holes.
Step 3: Establish the Base and Top
Then, what you want to do next is place the foam inside the incubator, the flat side facing down. Please make sure that it’s secured and set correctly not to move.
Place the incubator’s hood with the digital LED panel facing up when that’s stable. Afterward, plug the incubator into power.
Step 4: Configure the ReptiBator
Wait for the LED display to activate and light up. You’ll have to set whether you want Fahrenheit or Celsius in this step.
To do this, press and hold Warmer, and then press Cooler to switch.

Then, configure the incubator’s default temperature by clicking Warmer or Cooler. Let the temperature sit for about six (6) minutes to become the default.
NOTE: You know that the incubator is heating when you see the LED indicator flashing.
Step 5: Set the Temperature Alarm Function
Lastly, secure your incubator’s temperature by setting up the alarm function. Press Cooler and then set the degrees you want for the alarm to go off to set this up.
Like the temperature, let it sit for six (6) minutes to be recognized. Once done, your Zoo Med Incubator is now ready for use!

Tips in Using Zoo Med ReptiBator: Digital Reptile Egg Incubator
To make sure that you’re using the product to its fullest, try to use a secondary thermometer, check the humidity and temp regularly, and double-check the eggs before you move or tamper with them.
1. Consider Using a Secondary Thermometer
Although the egg incubator has a built-in thermometer, a secondary thermometer can make the readings more accurate and precise. Place the secondary thermometer inside the incubator close to the eggs to read the closest temperatures.
2. Check the Temp & Humidity Regularly
Make it a habit to check and assess the temperature in the incubator to ensure that the temperature levels are just right.
For best results, check it once (1) every six (6) hours to be sure that the eggs are incubated properly.
3. Check the Eggs Carefully
Lastly, handle all your reptile eggs with care. Avoid turning or rotating them, and most importantly, refrain from taking the eggs out prematurely.
FAQs
If you need a bit more information, here are some of the most thrown questions about the Zoo Med reptile incubator.
Can You Incubate Chicken Eggs in the Zoo Med Incubator?
No, it’s not advisable to use the Zoo Med reptile egg incubator for poultry or chicken eggs. Its engineering isn’t designed to incubate chicken eggs. Doing so will most likely damage the chick inside the egg.
Is 70% Humidity Too High For an Incubator?
70% humidity is a level that’s just right for reptile eggs. A humidity range of 70 to 75% is the best and most ideal because this will give the eggs enough humidity for swearing and breathing, but not to the point where molds and bacteria will live.
Is Zoo Med’s ReptiBator the One For You?
In my honest, professional opinion, I consider the Zoo Med Incubator as my go-to reptile egg incubator because of its versatility and ease of use.
You can configure and treat it as a perfectly durable egg container, no matter what type of reptile you have. You won’t need any other egg incubator once you’ve used Zoo Med’s masterpiece!

What do you think of the Zoo Med incubator? Let us know below!
Resources
- 1. Reptile Incubation Time and Temperature [Internet]. incubatorwarehouse.com. Available from: https://incubatorwarehouse.com/reptile-incubation-time-and-temperature
- 2. Download Limit Exceeded [Internet]. citeseerx.ist.psu.edu. [cited 2022 Feb 18]. Available from: http://citeseerx.ist.psu.edu/viewdoc/download?doi=10.1.1.602.919&rep=rep1&type=pdf

Alina Hartley is a small-town girl with a ginormous love of bearded dragons. It all started with Winchester, a baby bearded who was abandoned at the shelter by his former owners because of a birth defect that caused one front leg to be shorter than the other. Alina originally went to the shelter looking for a guinea pig, but one look at Winchester and it was love at first sight. From that day on, Alina has dedicated her life to learning everything she can about bearded dragons. She loves helping new beardie parents start their incredible journey with these magnificent reptiles.
Follow her on:
LINKEDIN
TWITTER.
Read her latest articles HERE
Learn more about her HERE.